There are two basic schools of thought about how often to adjust Jekyll
front derailleur position: 1) For riders who change geometry often and
don't want to adjust the front derailleur every time, the front derailleur
position can be adjusted once - with the shock set back fully in the shock
mounting collar (steepest angles/highest bottom bracket, see Fig. 4) -
and ridden that way regardless of future geometry adjustment. This
method sacrifices a bit of shifting performance for maximum riding time
and minimum fussing over the front derailleur. 2) For riders who find a
geometry setting they like and stick with it, or for riders who are unwilling
to compromise shifting performance regardless of the amount they adjust
the geometry, the front derailleur position can be re-adjusted every time
the geometry changes. Of course this means a little more time in the bike
stand but it returns excellent shifting.
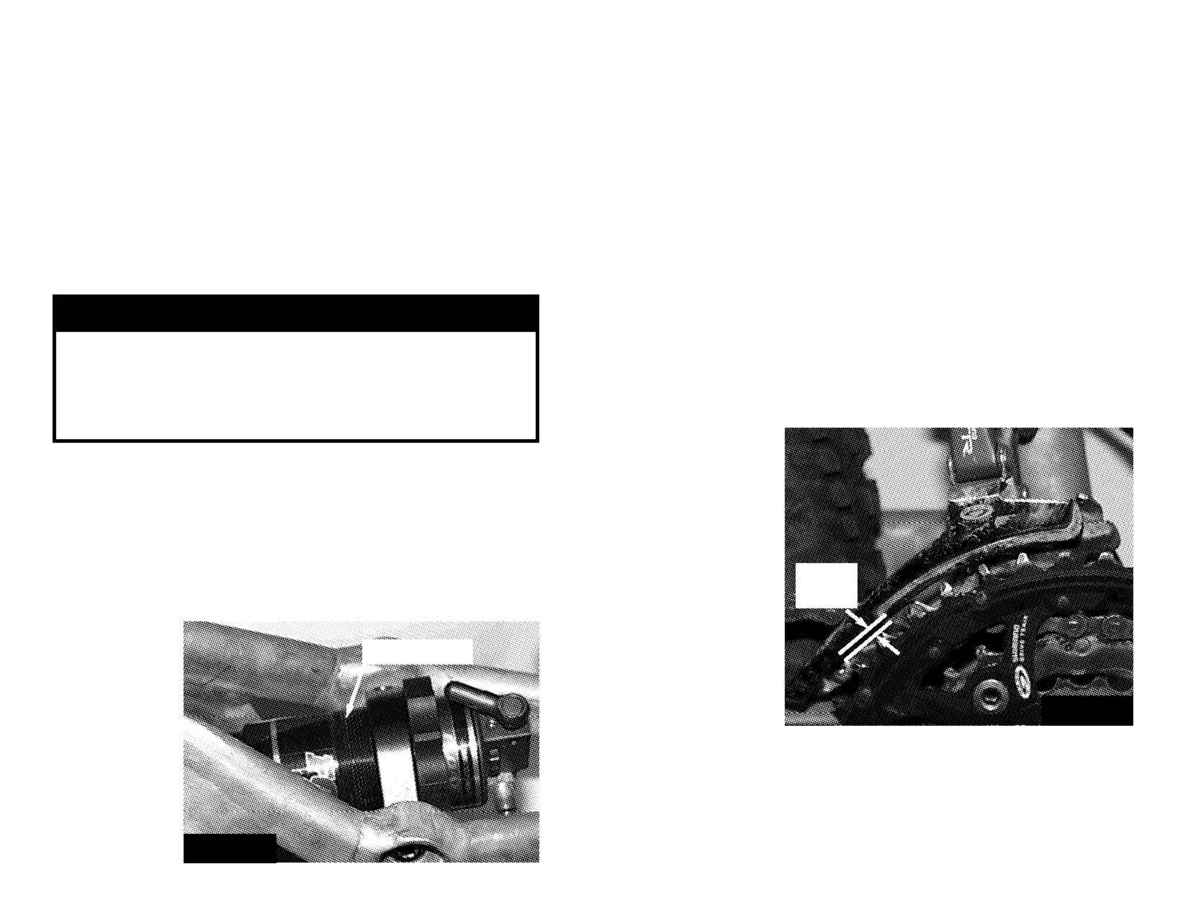
Proper positioning for a Jekyll front derailleur should be set with the
shock adjusted to the desired position in its mounting collar and with no
weight on the bike. If you're a rider #1 from the paragraph above, the
shock should be
positioned fully aft
in the mounting
collar. For option 2,
the shock will be
set to whatever
position you just
chose. Either way,
the derailleur cage
should measure
approximately
1mm-3mm above
the large chainring
(see Fig. 5).
Regardless of how often you choose to re-position the front derailleur, its
positioning must be checked whenever changing geometry to increase
angles/raise the bottom bracket. Because the rear end of the derailleur
cage moves towards the chainrings whenever the shock is threaded aft
in the shock mounting collar, there is real danger that this type of
5. Secure the shock in place using a Park red pin spanner by tightening
the lock ring against the shock-mounting collar. Tighten the lock ring
firmly to prevent the shock from moving within the collar's threads. If your
bike is equipped with Cannondale Remote Rear Lockout, see the
Cannondale Remote Rear Lockout instruction supplement (available on
the web), or an authorized Cannondale retailer, for detailed instructions
on how to set it back up properly.
NOTE: After making a geometry adjustment, you may want to change
the angle and/or position of your saddle to maintain optimal comfort and
your desired riding position.
FRONT DERAILLEUR ADJUSTMENT--VERY IMPORTANT
The Jekyll's rear suspension design places the front derailleur's
attachment point on the swingarm, meaning that the derailleur's position
relative to the chainrings changes as the swingarm position changes. A
properly positioned Jekyll front derailleur will not suffer decreased
performance through regular shock compression and rebound, but a front
derailleur not re-
positioned after
an increasing
angles/raising BB
geometry
adjustment will
cause poor
shifting and risks
damage to the
derailleur and
front chainrings.
CAUTION
If your geometry adjustment increases the angles/raises the
bottom bracket the bike, make sure that the front derailleur doesn't
interfere with the chainring teeth. See the following paragraph
about front derailleur adjustment.
Note Threads
Fig.
Fig.
5
5
5
1mm-
3mm
14
15
Fig.
Fig.
4
4
5
