Product Instructions
IMPORTANT WARNINGS
WARNING: While we cannot foresee all hazards, many POTENTIAL HAZARDS are described below, as are steps you must
take to AVOID THE HAZARDS.
- Safe and proper installation of this rack requires that you properly adjust and use a quick release. Please ask your retailer
to demonstrate proper quick release closure and be sure to read the Cannondale Bicycle Owner's Manual that came with your
recumbent. This manual is also on our web site at: http://www.cannondale.com/bikes/tech/pdfs/2002_OM.pdf.
- The rack carries the panniers low to the ground. Reasonably safe ground clearance and cornering clearance must be
determined before riding. There are many pannier designs you might choose to use. We cannot predict or anticipate the many
possibilities. We urge you to have an experienced bicycle mechanic with recumbent experience help you to determine if the pan-
niers you wish to use are reasonably safely compatible with this rack and bicycle.
- The weight that panniers allow you to carry will significantly affect the handling and braking performance of your bicy-
cle. You must take time to get used to these new handling, braking and cornering clearance characteristics on a quiet road away
from traffic before riding in traffic or on busy roads. You must ride in a more cautious way and leave longer distances for braking.
- Before riding be sure that your panniers are properly and securely mounted on the rack. Take the time to carefully check.
The rack is under the seat and it will be harder to see the pannier attachment.
- As noted in the Cannondale Recumbent owner's manual supplement we urge you to remove the seat assembly, which
now will include the rack, before transporting your bicycle on top of a car. The force, drag and turbulence of 60 mph wind on
the seat and panniers will increase fuel consumption, drag, noise, stress on your rack and may cause the loss of your panniers or
whole bike.
WARNING: WHAT CAN HAPPEN: Failure to follow these warnings could lead to an accident, with risk of serious injury, paral-
ysis or death.
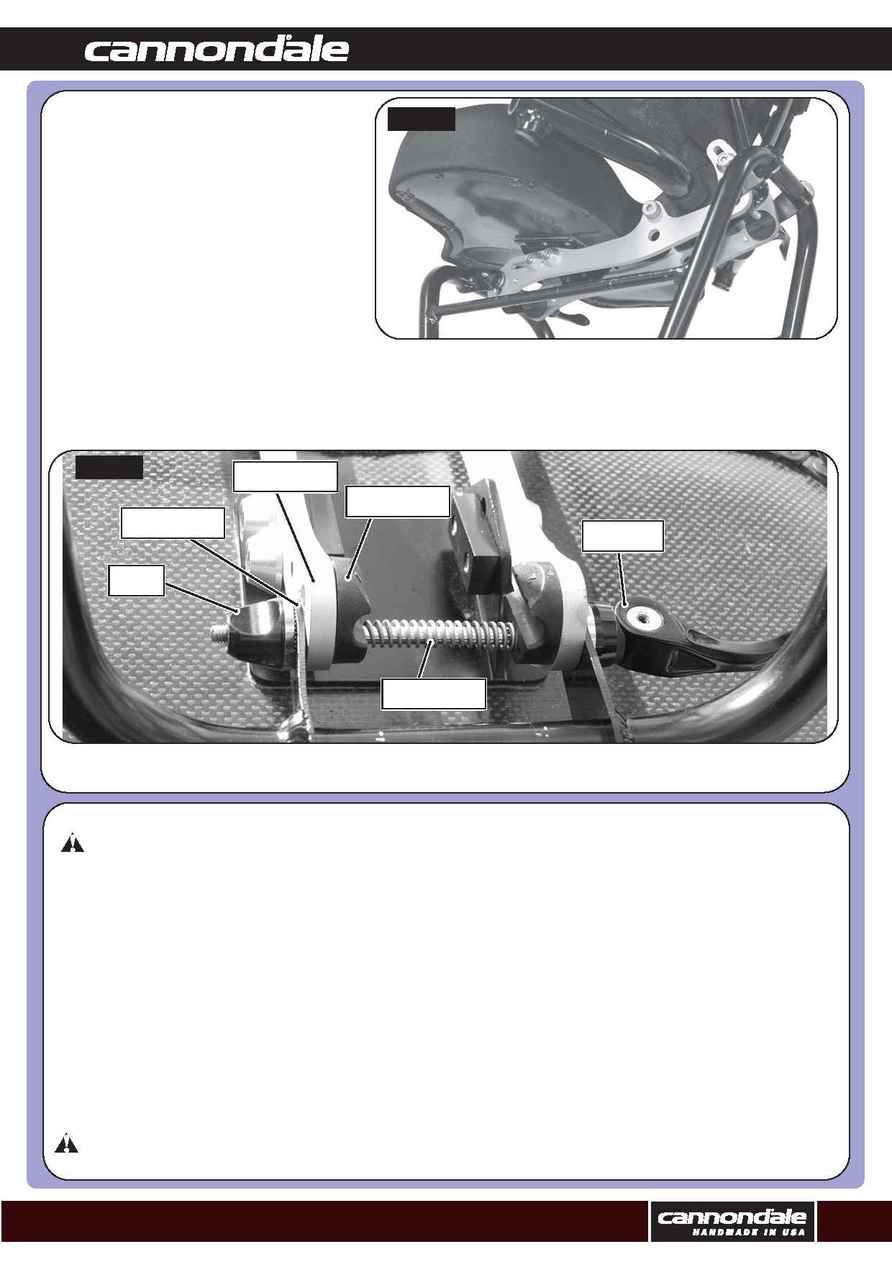
If it moves, the quick releases need to be tighter. The
cross bars of the rack should be parallel with the ground
when the rack is installed.
Attaching Panniers
Correct pannier attachment to the rack will depend upon
the design of the panniers you choose. Since there are
many pannier designs and pannier mounting systems, we
urge that this installation be done by an experienced bicy-
cle mechanic.
Some panniers types will have a hook that will fit over the
lower cross bar of the rack.
Other panniers types will require a pannier hooks be
mounted on the lower cross bar. A hole has been pre-drilled
for the mounting of pannier hooks.
If pannier hooks are needed, we urge that the screws used to mount them be installed with blue Loctite #242 or nylon lock nuts.
The rack carries the panniers low to the ground. There are many pannier designs. We urge that you work with an experienced bicycle mechanic
with recumbent experience help you to determine if the panniers you wish to use are reasonably safely compatible with this rack and bicycle. We
can tell you that panniers that are relatively square with wide lower shapes may not provide adequate cornering clearance. Look for panniers with
slim or tapered lower shapes to maximize cornering clearance. Before riding, load the panniers per the pannier manufacturers instructions and
lean the bike.
Observe warnings, mounting instructions and weight limit provided by the pannier manufacturer. Use panniers only in pairs and distribute the load
evenly between the panniers.
NUT
RAIL GUIDE
RACK BRACKET
SEAT BASE
SPRING
SKEWER
F
Fiigg.. 33
F
Fiigg.. 44
