E.3
CHAPTER ONE
Guide to Safe Child Carrier Use
Each of these mechanisms allow a wheel to be
installed and removed without tools. For proper
and safe performance, carefully read and follow the
general information as well as the specific instruc-
tions for the type of wheel retention mechanism on
your child carrier:
Check all wheels of the child carrier before
every ride.
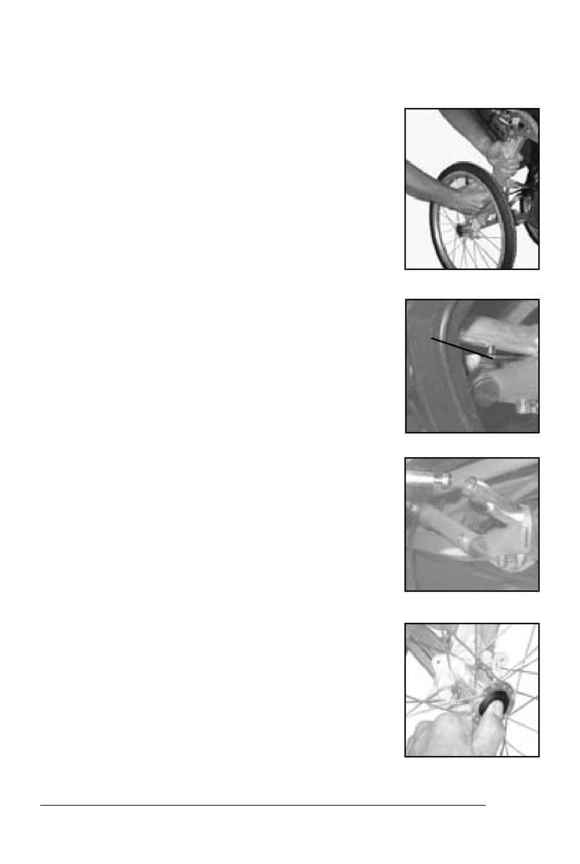
1. Attempt to pull the wheel away from the child
carrier (Figure 1.3).
The wheel should not come off or be loose.
2. If the quick-release fails any test, repeat these
adjustment procedures, including this test, or take
the child carrier to your Trek dealer for service.
Operating clip-pin quick-release device (Rocket)
To open (remove the wheel)
1. Pull the clip (Figure 1.4) away from the axle until
the pin disengages from the hub axle (Figure 1.5).
2. Pull the wheel outwards away from the carrier
until the axle disengages from the axle tube.
To close (install the wheel)
1. Insert the rear hub axle (Figure 1.5) into the
axle tube until the locking clip (Figure 1.6)
engages.
You should hear a click as this happens, and the clip should
sit flush against the axle tube.
2. See
Check all wheels of the child carrier before
every ride.
Operating push-button quick-release device
(Dash, Dash Pro, CC Ryder, Transit)
To open (remove the wheel)
1. Press the rubber-covered center button of the
wheel hub (Figure 1.6) and pull the wheel
outwards away from the carrier until the axle
disengages from the axle tube.
To close (install the wheel)
1. Push the button and insert the axle into the
axle tube.
2. See
Check all wheels of the child carrier before
every ride.
Figure 1.4 - Locking clip-pin
Clip
Figure 1.5 - Rocket hub axle and
axle tube
Figure 1.6- Wheel hub center
push-button
Figure 1.3- Test for quick-release
mechanism engagement
