E.21
CHAPTER TWO
Guide to Safe Bicycle Trailer Use
To attach the trailer to the lead bicycle
1. Slide the hitch ball into the hitch cup (Figure
2.6).
2. Insert the locking pin (Figure 2.6) through the
top of the hitch cup.
The small ball bearing on the locking pin must show below
the bottom of the hitch cup.
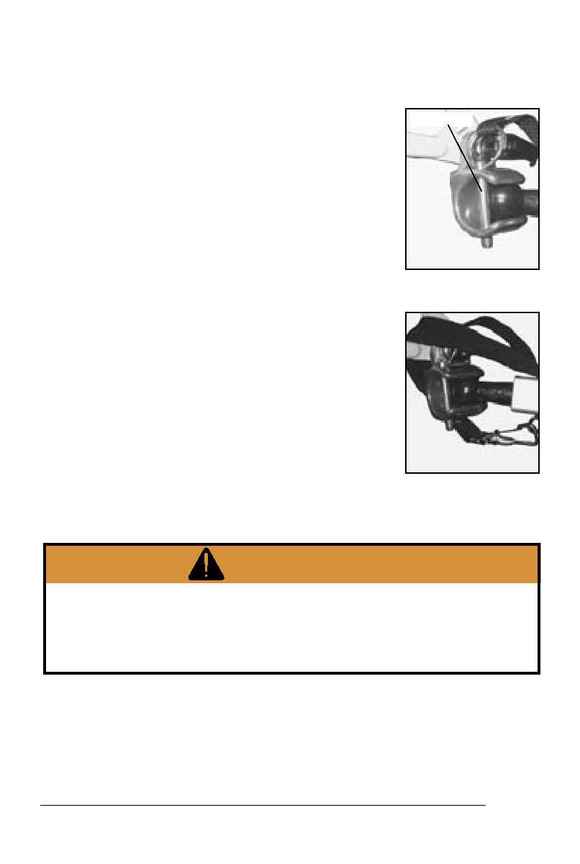
3. Connect the backup strap (Figure 2.7).
Wrap the strap around the bicycle seat stay or chain stay and
clip it to the D-ring on the trailer tongue.
4. Ensure that the trailer is properly attached.
Attempt to slide the hitch ball from the hitch cup. Also
attempt to rotate the hitch cup about the axle or quick-
release. The hitch cup should not move or rotate, and the
ball must remain in the hitch cup. If the connection fails this
test, reinstall the trailer, or take it to your Trek dealer for
service.
To remove the trailer from the lead bicycle
The hitch cup may be left in place if desired.
1. Remove the backup strap.
2. Remove the locking pin.
3. Slide the hitch ball forward in the hitch cup
until the ball can be disengaged.
4. Re-insert the locking pin to prevent it from
getting tangled in the wheel.
Figure 2.7- Backup strap around
frame member
Locking pin
Figure 2.6- Locking pin holding
ball in cup
WARNING
Never pull a bicycle trailer without a properly attached hitch
with the backup strap connected. If the trailer becomes
loose, it could tip or crash resulting in personal injury.
Connect the trailer carefully by following these instructions,
or consult your Trek dealer.
