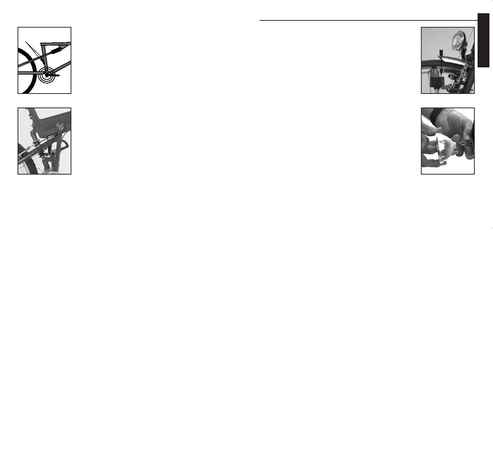
Figure 86
Tighten shock mounting bolts to 61-75 lb·in (6.9-8.5 Nm). Tighten pivot
bolts to 100-110 lb·in (11.3-12.4 Nm).
For bikes equipped with air shocks, start with a pressure in PSI about
30% less than your body weight in pounds (or KG x 0.10 in ATM). Note the
pressure on the pump gauge and try different settings at 10-15 PSI (0.7-1
ATM) intervals to fine tune the bike to the correct sag, or your preference.
On some models of shocks, the damping range is adjustable to control
the speed of the spring. Read your shock owner's manual to learn more
about damping adjustments.
Figure 87
Tighten shock mounting bolts to 61-75 lb·in (6.9-8.5 Nm). Tighten the
pivot bolt to 45-50 lb·in (5-5.7 Nm).
For bikes equipped with an air shock, start with a pressure in PSI of 20-
25% more than your body weight in pounds (or KG x 0.15 in ATM). Note
the pressure on the pump gauge and try different settings at 10-15 PSI
(0.7-1 ATM) intervals to fine tune the bike to the correct sag, or your
preference.
On some models of shocks, the damping range is adjustable to control
the speed of the spring. Read your shock owner's manual to learn more
about damping adjustments.
30
Introduction
To enhance their capacity for commuting, trekking bicycles are equipped
with accessories including a generator light set for improved visibility,
fenders to keep the bike and rider drier, a rack to carry belongings, and a
bell to sound warnings or greetings. All accessories must be properly
maintained for best service.
Inspection
Once a month check to ensure that the following nuts and bolts are tight.
Tighten the fender adjusting nuts to 30-40 lb·in (3.5-4.5 Nm). Tighten
fender and rack attachment bolts to 50-60 lb·in (5.7-6.8 Nm). If your bike
is equipped with other accessories they should also be inspected monthly.
Lights
The lights on your trekking bike have been designed and installed on
your bike for extra safety in conditions with poor visibility resulting from
either fog or dark. These lights are powered by a generator so no batteries
are required. However, for your lights to provide light the generator must
be engaged in the ON position, with your bicycle rolling with enough speed
to illuminate the light bulbs, usually about 3-4 miles per hour.
To turn on your generator and thus your lights, press down on the
generator body as shown in Figure 88. This will engage the generator and
the lights will come on as soon as your bike is rolling. You should visually
check that both the headlight and taillight are illuminated as you start to
ride. To turn off your lights, rotate the generator body away from its
contact with the tire until you hear a click. If you have done this correctly,
the generator should stay in the OFF position.
Check your lights. For best results, the lights should be carefully aimed to
provide the best blend of brightness and distance for your style of riding, as well as the best
location in front of your bike (generally centered directly in front of the bike). The lenses of the
lights should be kept clean. Remember that your field of vision may be diminished when riding at
night, even with the headlight on. You should adapt your riding speed for safety. Also remember
that although you have your lights on, you will be less visible than during daytime riding.
Always ride defensively!
In addition to aiming the lights on your bike and keeping the lenses clean for maximum
illumination, you may have to replace the light bulbs occasionally. It is recommended that you
do this every six months because no warning will precede the burning out of a light bulb. By
replacing the bulbs periodically you will reduce the risk of a bulb burning out during use of the
light which would leave you without a functioning light.
The wiring on your trekking bike lighting system may be partially enclosed inside the
frameset to protect the wires. Avoid pulling, tearing, or cutting these wires, as damaging the
wires will cause the light to cease to function.
Installing bulbs
To install a new bulb, locate the lens set-screw on the back of either the taillight or head light
(Fig. 89). Remove the screw with a Phillips screwdriver. After the screw has been completely
removed, rotate the lens 1/4 turn clockwise and lift the lens assembly off the bulb mount. You
may then unscrew the bulb, being careful not to crush the glass of the bulb.
Being careful not to dislodge the wire in the base of the bulb mount, install a new bulb and
reverse the disassembly procedure to reassemble your light. The correct bulbs can be
purchased from your dealer. The bulb has its volts and wattage listed on its base. The most
commonly used bulbs are:
· Headlight-
6V 2.4w
· Taillight-
6V 0.6w
31
TREKKING ACCESSORIES
Fig. 88
Fig. 89
ON
Fig. 86
Fig. 87
Linkage bolts
ENGLISH