tionally resize both the graphic frame and its image contents to whatever dimension you desire.
step five: Now, while still in the Selection tool and without any keyboard keys pressed, simply click anywhere in the
middle of your image and drag it to where you want it placed.
Practice this sequence until it is second nature!
Replacing Images
Sometimes when you place images weird things happen ... like your image is
placed at 100% inside your text frame ... and how the heck did that happen
anyway? The key to avoiding confusion when placing a graphic in InDesign
is to always keep track of two things: 1) What tool is currently selected and
2) what frame is currently selected. Then you want to pay attention to a very
important check box that is easy to miss. Lets start with a selected graphic
frame whose contents you want to replace.
step one: In this case you will want to start with your Direct Selection tool "A", the
right side selection tool, which will allow you to work with the contents of the
graphic frame rather than the Selection tool "V" that works more directly with
the frame itself. Click on the graphic you would like to select.
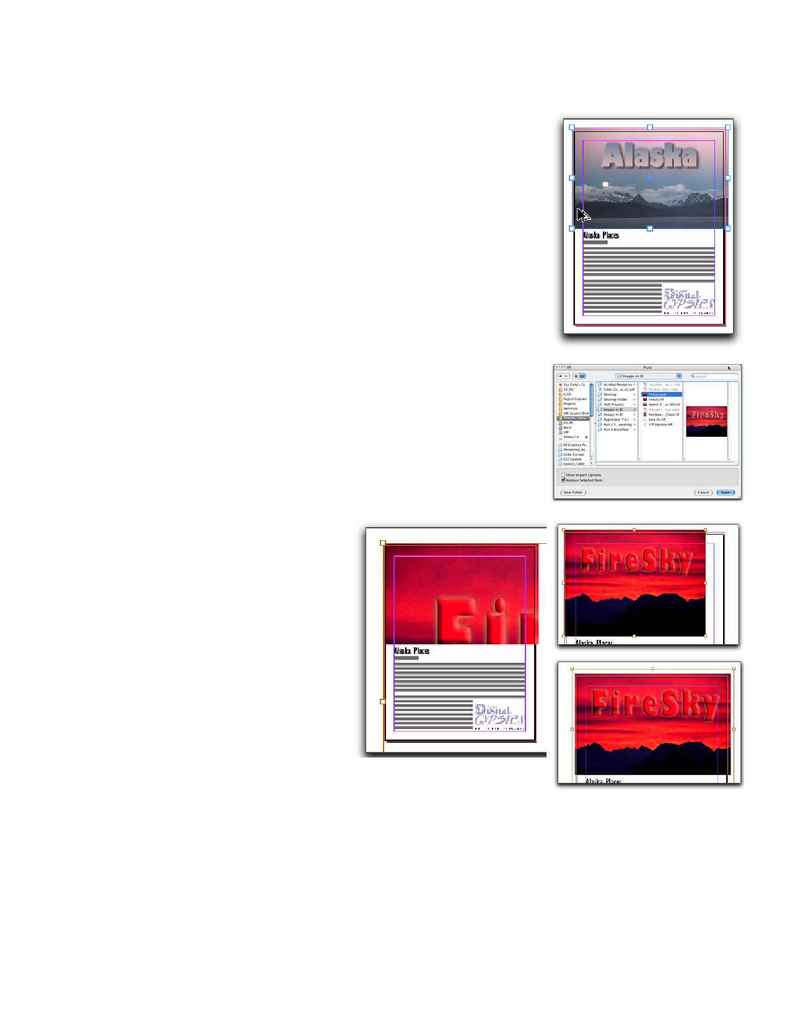
step two: Type Cmd + D to activate the place command.
Now here is the easy-to-miss check box!
step three: In the Place dialog that appears, look in the lower left corner and
check the Replace Selected Items check box. This will direct InDesign to
replace the graphic in the graphic frame you selected above. Now click OK..
Your replacement image will be placed at 100%
step four: Remaining in the Direct Select (content) tool, use keyboard shortcut
sequence you learned above (you will use this one a lot!) cmd + opt + shift +
E to Fit content (the image) Proportionally in
the graphic box.
step five: Now, with the direct tool still active,
click on this image and press the cmd + opt
+ > to enlarge (cmd + opt + < = reduce) the
dimensions of your image. You will notice
that the content is selected not the frame.
The Frame remains in place, as it should ...
remember you goal is only to replace the
image.
step six: At any point you can click and drag
the image to reposition it inside the graphic
frame. The keys here are: 1) to stay in the
Direct Selection tool the entire time, 2) know-
ing a couple of important keyboard short-
cuts. Practice this sequence until it becomes
second nature ... you will use it frequently!
This is a great sequence to use when you want to quickly duplicate a current
frame and image (using "V" to activate the Selection tool and then option + click + drag to duplicate and move
the initial graphic frame), and replace it with another graphic image. I used this sequence throughout this arti-
cle to quickly duplicate and replace images in all the same-size graphic frames you see here.
Next issue we will cover speed tips for applying wrap arounds and placing and controlling in-line graphics. in
InDesign.
