F1
F2
F3
F4
B1
B2
A1
A2
E1
E2
Back Panel Board
E1
E2
E4
E2
E3
1. U
NPACKING
Y
OUR
N
EW
U
PRIGHT
D
IGITAL
P
IANO
2. A
TTACHING
S
TAND
S
UPPORTS
T
O
P
EDAL
B
OARD
3. A
TTACHING
T
HE
B
ACK
P
ANEL
B
OARD
A.
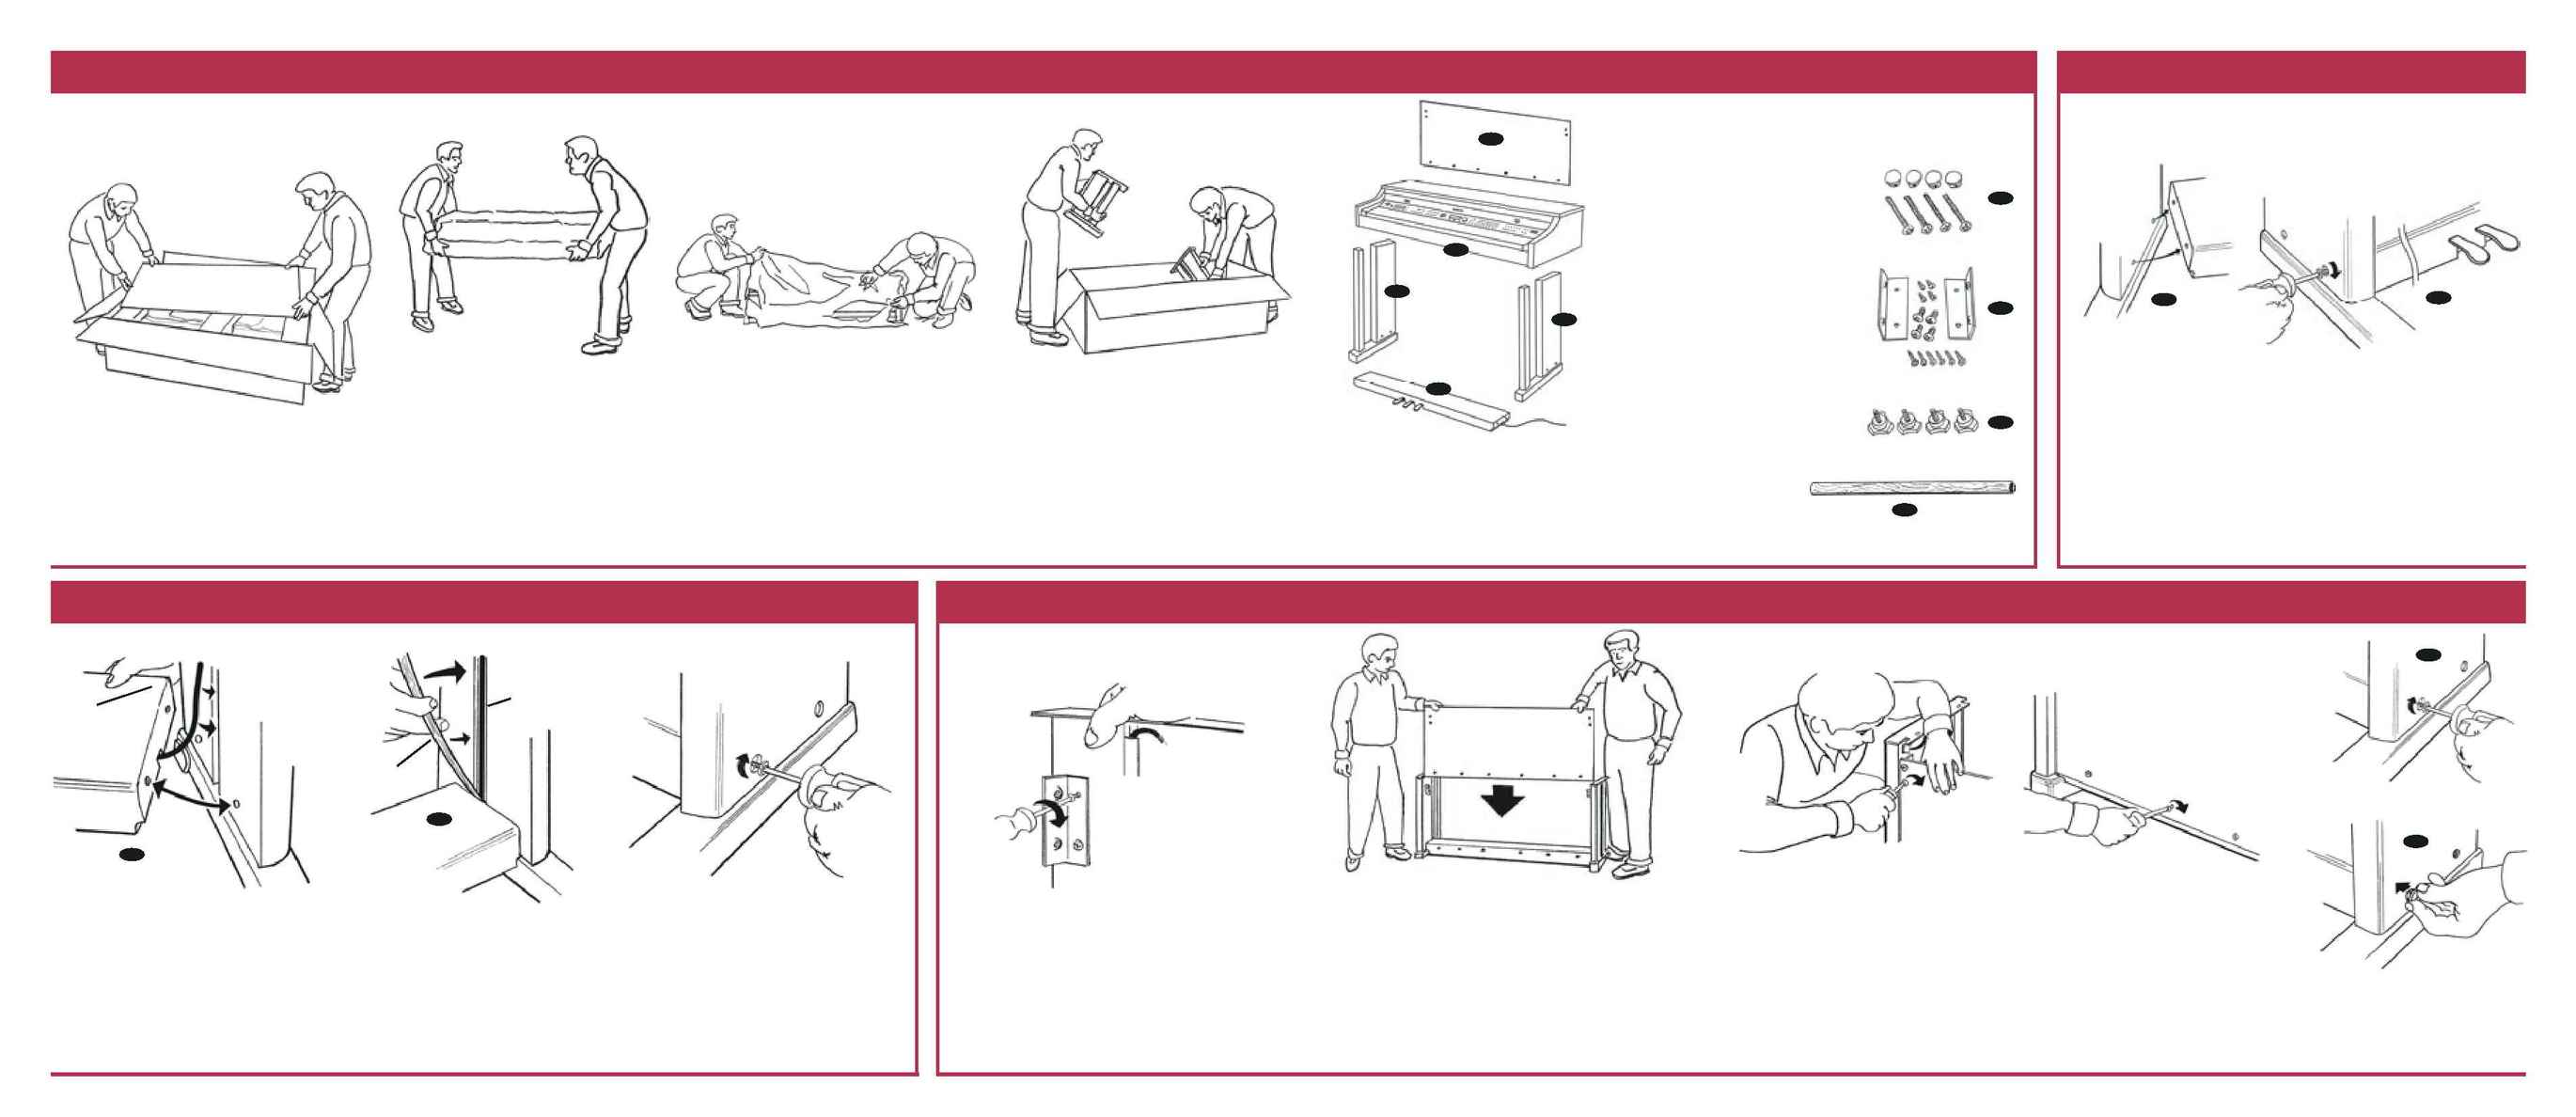
Open the piano carton. Remove and set
aside the Back Panel Board.
B.
Using 2 people, lift your new piano
out of the carton and place on a soft
surface such as a carpet or blanket.
C.
Remove the protective outer packing
materials from the piano.
IMPORTANT!
Use only your hands to remove the protective
materials. Sharp tools may damage the piano.
The lacquer finish of your piano is now exposed.
Take care not to let foreign objects come into
contact with the piano.
D.
Remove and unpack the remaining
parts of your piano from the carton.
Place them on a soft surface.
E.
Parts enclosed:
E1. Your New Piano
E2. Stand Supports, right and left side
E3. Pedal Board
E4. Back Panel Board
E5. Phillips Head Screwdriver
You will need the 4 long machine screws (F1) and Phillips head screwdriver.
A1.
Left Stand Support Installation: Line up the left Stand Support
with the Pedal Board.
A2.
Place the left Stand Support as shown (the small notch sits on top
of the foot). Thread a machine screw (F1) through one of the two holes
located in the lower part of the Stand Support into the corresponding
threaded lug in the end of the Pedal Board.
IMPORTANT!
Do not tighten the screws at this time. Thread them in most of the way.
B1.
Right Stand Support Installation: Locate and place the Pedal Control Cable into
the slot provided on the inside of the right Stand Support. Place the right Stand Support
in position as you did with the left Stand Support.
B2.
Push the Pedal Control Cable into the slot all the way to the top of the Stand
Support and snap the Pedal Control Cable Cover (F4) into the slot to hold the cable in
place. A small amount of cable will hang out at the top. This will be connected to the
piano later when the piano is placed on the completed stand.
A.
Find the 2 pre-drilled holes located towards the
top inside rear of both Stand Supports.
NOTE:
The brackets have 2 threaded holes and 2 smaller
unthreaded holes.
The smaller unthreaded holes are where you will
install the short wood screws, 2 for each side, into
the Stand Support. Tighten these now.
You will need the 2 right angle brackets (F2), 4 short machine
screws (F2), 4 short wood screws (F2), the 6 long wood
screws (F2) and 4 decorative screw caps (F1).
C.
Now thread the machine screws into
the end of the Pedal Board.
IMPORTANT!
Thread the machine screws in almost all the
way but do not tighten them at this time.
B.
Position the Back Panel Board on the rear of the stand
with the 2 pre-drilled holes located on each side up. The 6
holes on the long edge of the Back Panel Board down. The
Back Panel Board will sit on top of the Stand Supports.
NOTE:
The back panel board has a very close tolerance fit, which is
why we did not tighten the pedal board machine screws in
Part 2A. These screws may have to be loosened further for a
proper panel fit.
D.
Tighten the 6 wood
screws at the bottom of the
Back Panel Board. Tighten the
bracket machine screws you
installed in Part 3C.
E1.
Tighten the two screws on each
Stand Support.
E2.
Push in the 4 Decorative Caps (F1).
2. A
TTACHING
S
TAND
S
UPPORTS
T
O
P
EDAL
B
OARD
F.
Hardware enclosed:
F1. Stand Supports to Pedal Board
· 4 long machine screws,
4 decorative caps.
F2. Back Panel Board to Stand
Supports and Pedal Board
· 2 right angle brackets, 4 short
machine screws, 4 short wood
screws, 6 long wood screws.
F3. Piano to Stand Supports
· 4 black handled hand bolts.
F4. Pedal Control Cable Cover
· Small wood grained
snap-in strip.
(continued)
C.
Using the short machine screws
(F2) put them through the top side
holes in the Back Panel Board and
thread them into the brackets. Do not
completely tighten them at this time.
Pedal
Control
Cable
Pedal Control
Cable Cover
Pedal
Control
Cable
